
How to adjust the discharge gap of spring cone crusher?
The discharge gap of a spring cone crusher determines finished product size and crushing efficiency. The core principle is to change the space between the mantle and concave by lifting or lowering the fixed cone. You need to follow the standard process: safety preparation → unlock adjustment → lock and check → maintenance and calibration. Standard operation ensures stable machine running and good product quality.
Make full safety preparations before adjustment. Stop the machine and cut off the power. Wait until the machine completely stops, then clean out leftover materials inside the crushing chamber to avoid material jamming and personal injury. Check the equipment nameplate to confirm the adjustment range of the discharge opening: standard type 3-51mm, short head type 3-15mm. Never adjust beyond the specified range. Prepare special wrenches, crowbars and other tools. Check the locking springs, adjusting ring and screw threads to make sure there is no wear or deformation.
First, release the locking parts: evenly loosen the lock nuts and spring pressure plates around the adjusting ring to unlock the fixed cone, so as to prevent the adjusting ring from sticking caused by uneven force on one side.
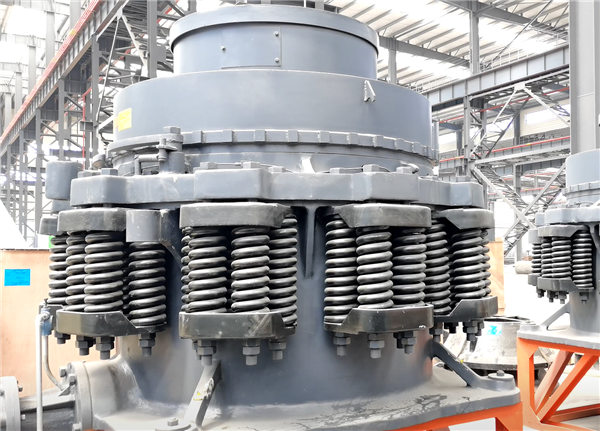
Second, rotate the adjusting ring to set the gap: turn the adjusting ring clockwise, the fixed cone moves down and the discharge gap becomes smaller for finer finished materials; turn it counterclockwise, the fixed cone moves up and the discharge gap becomes larger for coarser finished materials. Rotate 1 to 2 circles each time, with the gap changing about 2-3mm per circle. Measure the gap with lead ball method or feeler gauge while adjusting, keep the circular gap even with deviation within ±1mm.
Finally, lock and fix: after the gap reaches the standard, tighten the lock nuts and spring pressure plates evenly. Keep the spring compression consistent with proper locking force to prevent the fixed cone from shifting during operation.
Check and test run after adjustment. Turn the machine manually to ensure no jamming and abnormal noise. Run the machine with no load for 10 to 15 minutes, check vibration, temperature and discharging condition. Stop the machine and recheck the gap; make fine adjustment if the deviation is out of range. Liner wear will enlarge the gap. Replace the liners and recalibrate the gap when the wear exceeds 30% of the original thickness.
Daily maintenance and regular calibration are very important. Check the tension of locking springs regularly and replace weak springs in time to avoid failure of overload protection. Keep stable feeding speed to prevent uneven material load which causes abnormal local gap. Clean dirt on adjusting ring threads regularly and apply grease to avoid rust and sticking.
- What equipment is used to crusher stone into sand?
- Which is better for sand making: impact crusher or cone crusher?
- What equipment is used for producing coarse sand?
- How much does a sand making production plant cost?
- What are the differences between an impact crusher and a cone crusher?
- What stones are suitable for cone crusher?